WordPress is a content management system (CMS) widely used for create websites and blogs. Launched in 2003, it offers extensive themes and plugins, facilitating customization without coding. WordPress supports multimedia content, SEO, and e-commerce, making it popular among businesses, bloggers, and developers. Its user-friendly interface and community ensure ongoing improvements and support.create a website in wordpress its very easy. The power of WordPress easily create a website tailored to your needs.
Create A E-Commerce Website In WordPress – A Step By Step Guide
Creating an e-commerce website in WordPress can be a rewarding project, especially if you want to start selling products online. WordPress, combined with WooCommerce, provides a powerful and flexible platform for building an online store. Here’s a step-by-step guide to help you through the process.
Table of Contents
Step 1: Planning Your E-commerce Website
Before diving into the technical aspects, it’s important to plan your website. Consider the following:
- Target Audience: Understand who your customers are.
- Product Types: Decide on the types of products you will sell.
- Website Structure: Plan the structure of your site, including product categories, pages, and features.
- Design: Think about the look and feel of your website.
Step 2: Set Up Hosting and Domain
To create a website, you need a domain name (e.g., www.yourstore.com) and web hosting.
- Choose a Domain Name: Select a domain that reflects your brand and is easy to remember.
- Select a Hosting Provider: Choose a reliable hosting provider that offers good speed and uptime. Popular choices include Bluehost, SiteGround, and HostGator.
- Register Domain and Purchase Hosting: Register your domain name and purchase a hosting plan.
Step 3: Install WordPress
Most hosting providers offer easy WordPress installation through their control panels (e.g., cPanel).
- Access Hosting Control Panel: Log in to your hosting account and access the control panel.
- Find WordPress Installer: Locate the WordPress installer, often found under sections like “Website” or “Softaculous Apps Installer.”
- Run the Installer: Follow the on-screen instructions to install WordPress.
Step 4: Configure WordPress
Once WordPress is installed, you need to configure some basic settings.
- Log In to WordPress Admin: Go to www.yourstore.com/wp-admin and log in with your credentials.
- General Settings: Navigate to “Settings” > “General” and configure your site title, tagline, and other general settings.
- Permalinks: Go to “Settings” > “Permalinks” and choose a URL structure that is SEO-friendly, such as “Post name.”
Step 5: Choose and Install a Theme
Your website’s theme determines its design and layout. Choose a theme that is compatible with WooCommerce and looks professional.
- Go to Appearance: In the WordPress admin dashboard, go to “Appearance” > “Themes.”
- Add New Theme: Click “Add New” and search for themes. Popular free themes include Astra, OceanWP, and Storefront.
- Install and Activate: Once you find a theme you like, click “Install” and then “Activate.”
- Customize Theme: Go to “Appearance” > “Customize” to adjust the theme settings to match your brand.
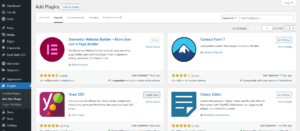
Step 6: Install Essential Plugins
Plugins extend the functionality of your WordPress site. Here are some essential plugins to consider:

6.1 SEO
- Yoast SEO: Improves your site’s SEO.
6.2 Security
- Wordfence Security: Provides firewall and malware protection.
6.3 Performance
- WP Super Cache: Speeds up your site by caching pages.
6.4 Backup
- UpdraftPlus: Automates backups of your site.
6.5 Contact Forms
- Contact Form 7: Allows visitors to contact you via a form.
6.6 Installing Plugins
To install a plugin:
- Go to Plugins > Add New.
- Use the search bar to find the plugin you need.
- Click Install Now and then Activate.
Step 7: Install WooCommerce Plugin
WooCommerce is a powerful e-commerce plugin for WordPress that will add all the necessary e-commerce functionalities to your site.

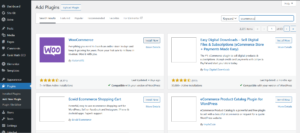
- Go to Plugins: In the WordPress admin dashboard, go to “Plugins” > “Add New.”
- Search for WooCommerce: In the search bar, type “WooCommerce.”
- Install and Activate: Click “Install Now” and then “Activate” to activate the plugin.
- Run the Setup Wizard: WooCommerce will prompt you to run a setup wizard. Follow the steps to configure your store’s basic settings, such as currency, payment methods, and shipping options.
Step 8: Add Products
With WooCommerce set up, you can start adding products to your store.
- Go to Products: In the WordPress admin dashboard, go to “Products” > “Add New.”
- Add Product Details: Enter the product name, description, price, and other relevant details.
- Set Product Image: Upload a product image by clicking “Set product image” in the Product Image section.
- Product Categories and Tags: Assign your product to categories and add relevant tags to improve navigation and SEO.
- Inventory Management: Under the “Inventory” tab, manage stock levels and SKU information.
- Publish Product: Once all details are filled in, click “Publish” to make the product live on your site.
Step 9: Configure Payment Methods
WooCommerce supports various payment gateways. Choose the ones that best suit your needs.
- Go to WooCommerce Settings: In the WordPress admin dashboard, go to “WooCommerce” > “Settings” > “Payments.”
- Enable Payment Gateways: Enable the payment gateways you want to use, such as PayPal, Stripe, or direct bank transfer.
- Configure Settings: Click on each payment gateway to configure its settings. You’ll need to enter details such as API keys or account information.
Step 10: Set Up Shipping Options
Configure your shipping options to define how you will deliver products to your customers.
- Go to Shipping Settings: In the WooCommerce settings, go to the “Shipping” tab.
- Add Shipping Zones: Define shipping zones based on regions or countries.
- Add Shipping Methods: For each zone, add shipping methods such as flat rate, free shipping, or local pickup.
- Configure Rates: Set the shipping rates for each method.
Step 11: Configure Tax Settings
Set up tax settings to ensure you comply with local tax laws.
- Enable Taxes: In the WooCommerce settings, go to the “Tax” tab and enable taxes.
- Configure Tax Options: Set up tax calculations, display settings, and tax classes according to your region’s tax regulations.
Step 12: Enhance Functionality with Plugins
Extend the functionality of your e-commerce site with additional plugins.
- SEO Plugins: Install plugins like Yoast SEO or Rank Math to improve your site’s SEO.
- Security Plugins: Enhance site security with plugins like Wordfence or Sucuri.
- Performance Plugins: Improve site speed with caching plugins like W3 Total Cache or WP Super Cache.
- Email Marketing: Use plugins like Mailchimp for WooCommerce to manage email marketing campaigns.
Step 13: Design Essential Pages
Create and design essential pages such as the homepage, shop page, cart page, checkout page, and contact page.

- Homepage: Use the WordPress Customizer or a page builder plugin like Elementor to design your homepage.
- Shop Page: WooCommerce automatically creates a shop page. Customize it by going to “Appearance” > “Customize” > “WooCommerce” > “Product Catalog.”
- Cart and Checkout Pages: WooCommerce also creates these pages automatically. Customize them under “WooCommerce” > “Settings” > “Advanced.”
- Contact Page: Create a contact page using a form plugin like Contact Form 7 or WPForms.
Step 14: Add Content
14.1 Adding Posts For Blog
To create a new blog post:
- Go to Posts > Add New.
- Enter your title and content.
- Use categories and tags to organize your posts.
- Add a featured image.
- Click Publish.
14.2 Adding Content In Pages
To create a new page:
- Go to Pages > Add New.
- Enter your title and content.
- Click Publish.
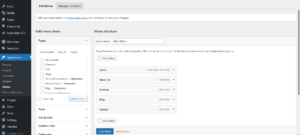
14.3 Adding Menus
To create a Menus:
- Go to Appearance> Menus.
- Add Menus.
- Click Save.
Step 15: Test Your Store
Before going live, thoroughly test your e-commerce site to ensure everything is functioning correctly.
- Place Test Orders: Make test purchases to ensure the checkout process works smoothly.
- Test Payment Gateways: Verify that all payment gateways are processing payments correctly.
- Check Mobile Responsiveness: Ensure your site looks and functions well on mobile devices.
- Review User Experience: Navigate through your site as a customer to identify any usability issues.
Step 16: Launch Your E-commerce Website
Once you’re confident that everything is set up correctly and tested, it’s time to launch your site.
- Announce Your Launch: Announce your site launch on social media, email newsletters, and other marketing channels.
- Monitor Performance: Use tools like Google Analytics to monitor site traffic and performance.
- Ongoing Maintenance: Regularly update WordPress, themes, and plugins to keep your site secure and running smoothly.
Step 17: Analyze and Improve
Continually analyze your store’s performance and make improvements based on data.
- Monitor Sales Data: Use WooCommerce’s built-in analytics or integrate with Google Analytics.
- Customer Feedback: Collect and act on customer feedback to improve your products and services.
- A/B Testing: Test different versions of your site’s pages to see what works best.
Step 18: Market Your Store
After launching, focus on marketing your store to attract customers and generate sales.

- SEO: Optimize your site for search engines to increase organic traffic.
- Social Media Marketing: Promote your products on social media platforms.
- Email Marketing: Send newsletters and promotional emails to your subscribers.
- Paid Advertising: Consider running paid ad campaigns on platforms like Google Ads and Facebook Ads.
By following these steps, you can create a fully functional and attractive e-commerce website using WordPress and WooCommerce. Good luck with your online store!


